
The second proofs of a non-fiction book are due back at the typesetter on Friday. The author has marked up the PDF, the editor has marked a printout, and a co-author has emailed a list of fixes whose page numbers no longer match, because the first round of corrections moved the text. Someone now has to merge three sets of corrections into one, and nobody is sure whether the new paragraph in chapter 4 was agreed or only suggested.
A publishing workflow can prevent this by settling in advance which version each person checks, where corrections go and who says the book, issue or article is ready.
What is a publishing workflow?
A publishing workflow is the agreed sequence of editorial and production stages a text goes through, from the accepted manuscript or draft to publication. Each stage has people who do the work and one person who signs it off, and the next stage starts only after that sign-off.
Books, magazines, journals and web articles can all run through these stages. At Taylor & Francis, an accepted journal article goes into production, where copy editing begins and proofs are created for the author to review; a correction after publication starts with the author contacting the publisher (Taylor & Francis Author Services). WordPress builds the same gate into its post statuses: a user who may edit but not publish sees “Submit for Review” instead of “Publish”, and the post waits as pending until a user with publishing rights, typically a user with the Editor role, publishes it (WordPress documentation, 2023).
A publishing workflow is narrower than a content workflow from brief to publication, which also covers planning and measuring. It starts with a text to publish and ends when the published version is correct.
Why publishing workflows break
Publishing workflows break when decisions are still open at a stage where changes have become expensive. A sentence rewritten in the manuscript is a quick fix for the editor. The same sentence rewritten on a typeset page can push lines onto the next page, move a picture and shift the page numbers that the index or contents refer to.
Plan the proof for corrections and settle rewrites before layout. The Chartered Institute of Editing and Proofreading describes the proof as the quality check that proves the many small changes by copy editors, designers and typesetters have worked, “supposedly the final version”. The proofreader marks any last-minute corrections on it, and the printer or webmaster adds them in before release (CIEP, 2024). Trouble starts when content questions reach that stage, or when several people mark corrections on different copies.
The publishing workflow in 7 steps
End each step with a sign-off by one named person. The table suggests a split of roles that you can adapt to your team, and the steps say what to agree at each one.
| Stage | Who works on it | Suggested sign-off | The sign-off means |
|---|---|---|---|
| 1. Acceptance | Commissioning editor | Publisher or editor-in-chief | The text goes into production |
| 2. Structural edit | Editor, author | Editor | Content and structure are fixed |
| 3. Copyedit | Copy editor, author | Author | Wording is final, queries are answered |
| 4. Layout or typesetting | Designer or typesetter | Production editor | Pages follow the agreed design |
| 5. Proofs | Proofreader, author, editor | Production editor | All corrections are on one proof |
| 6. Final sign-off | Production editor | Publisher, editor-in-chief or client | This exact file may be published |
| 7. Publication | Production, web editor | Editor | The published version is the approved one |
In a small team, one person may cover several roles. Keep the sign-offs anyway, because each marks a point after which changes cost more.
1. Accept the manuscript or draft
Check the delivered text against what was commissioned: length, scope, delivery date and the rights to images and quotations it uses. Only an accepted text goes into editing, so nobody edits a chapter that is later cut.
2. Fix content and structure
The structural or developmental edit settles the big questions: the order of chapters or sections, missing arguments, length. After this point, rewriting gets more expensive. Let the editor sign off once editor and author agree that the content is complete.
Try it yourself: In the demo you work in a real draftgo workspace with sample data.
3. Copyedit, then let the author answer
The copy editor works through the text line by line for consistency, accuracy and house style, and leaves a query wherever the meaning is unclear. The author then checks that the edits have not changed what they meant and answers each query. That sign-off makes the wording final before layout.
4. Set the pages
The designer or typesetter flows the copyedited text into the layout and places images, captions, tables and the contents page. For print, the file is also prepared to the printer’s specification, covered in the guide to prepress from print file to press. A good choice for this sign-off is the production editor, once the pages follow the agreed design.
5. Collect every correction on one proof
The proofreader checks the typeset pages for errors that slipped through and for problems the layout introduced, such as bad breaks, missing lines or wrong page references. Author and editor read the same proof, and every correction goes onto that one copy, marked at the exact spot. Let the production editor settle conflicting corrections before the proof goes back to the typesetter, so the second proof only needs checking against the list from the first. The guide to the content review process shows how to split a round into checks and roles.
6. Sign off the final file
The final sign-off approves one specific file: the one that goes to the printer or into the CMS. Agree in advance who gives it, whether the publisher, the editor-in-chief or, for commissioned work, the client. If anything changes after it, the changed file needs a new sign-off, and the rules for document version control keep that visible.
7. Publish and log corrections
Before release, compare what goes out with the signed-off file, in the printer’s final proof or the CMS preview. Errors found after publication go into a corrections log with what changed and when, so the next reprint or edition picks them up. A record of who approved which version, your audit trail for approvals, answers later questions about what was signed off.
Mistakes that cost an extra proof round
Each of these mistakes can cost an extra proof round, and each has a fix you can agree before the first proof goes out.
| Mistake | What happens | Better practice |
|---|---|---|
| Rewriting on the proof | Text reflows, pages and references shift | Content changes before layout, only corrections on proofs |
| Each reader marks a separate copy | Corrections contradict each other or get lost | One shared proof that everyone marks |
| Corrections cite page numbers of an older proof | The typesetter fixes the wrong line | Corrections only on the current proof |
| The author sees the copyedit only at proof stage | Answers to queries arrive as rewrites | Author review between copyedit and layout |
| Sign-off on a proof, not on the final file | Late fixes go out unchecked | Sign off the exact file that is published |
| Nobody owns conflicting corrections | The typesetter has to guess | One named person, such as the production editor, decides |
Practical example: a quarterly members’ magazine
Take a freelance editor and a freelance designer who produce a 48-page quarterly magazine for a professional association. Its communications manager decides what is published, the chair writes the editorial, and a dozen members contribute articles.
The editor accepts each article against the issue plan, edits it and sends the copyedited text back to its author for the queries. Only articles the author has signed off go to the designer. The communications manager, the chair and the authors then read the first proof of all pages in one round: the communications manager approves, while the chair and the authors only comment. The editor settles conflicts, the designer applies the corrections, and the second proof is checked against that list. The communications manager signs off the print file itself, not the proof before it, and the same PDF goes to the printer and onto the association’s website.
How it works in draftgo
In draftgo, the proof and sign-off stages of your publishing workflow run on the file itself: everyone marks the same PDF, and each sign-off belongs to one version.
You upload the proof as a PDF, or as a Word file that draftgo converts into a PDF on upload, and set up a loop for each sign-off, for example “Proof corrections” and “Final sign-off”. A project holds one loop on Free, three on Freelancer and as many as you need on Agency and Team. Then you select the files and activate the loop for them.
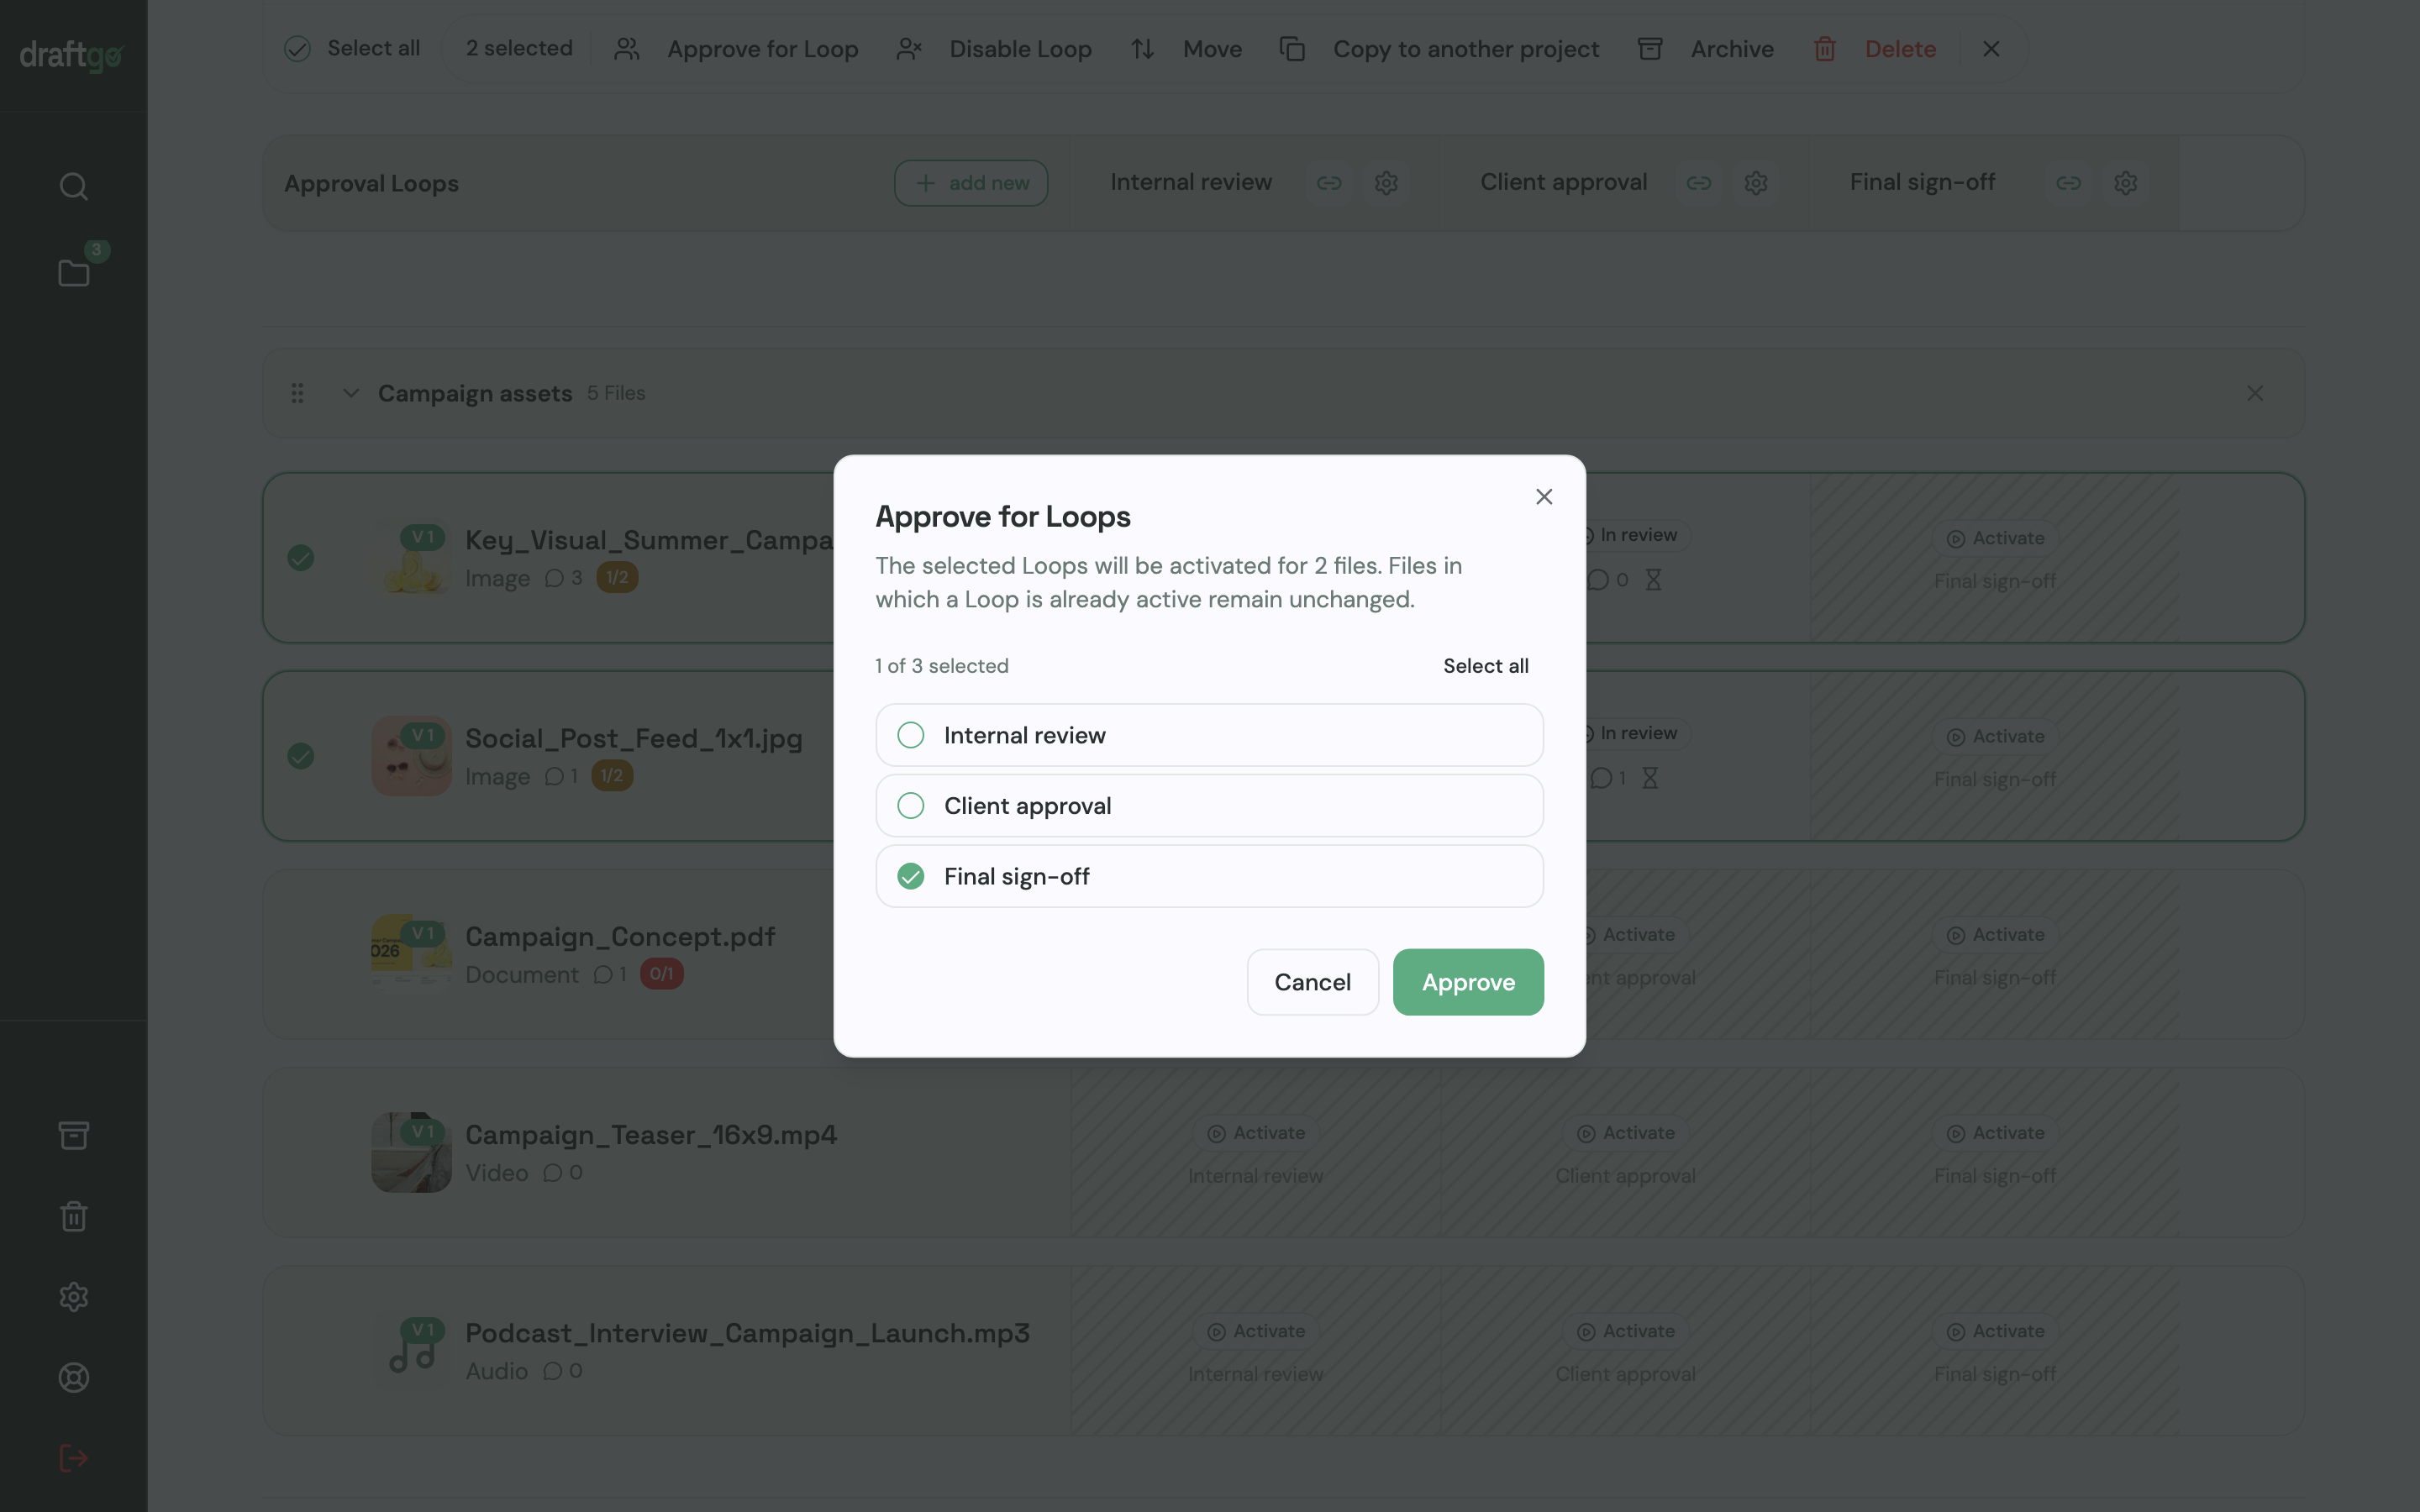
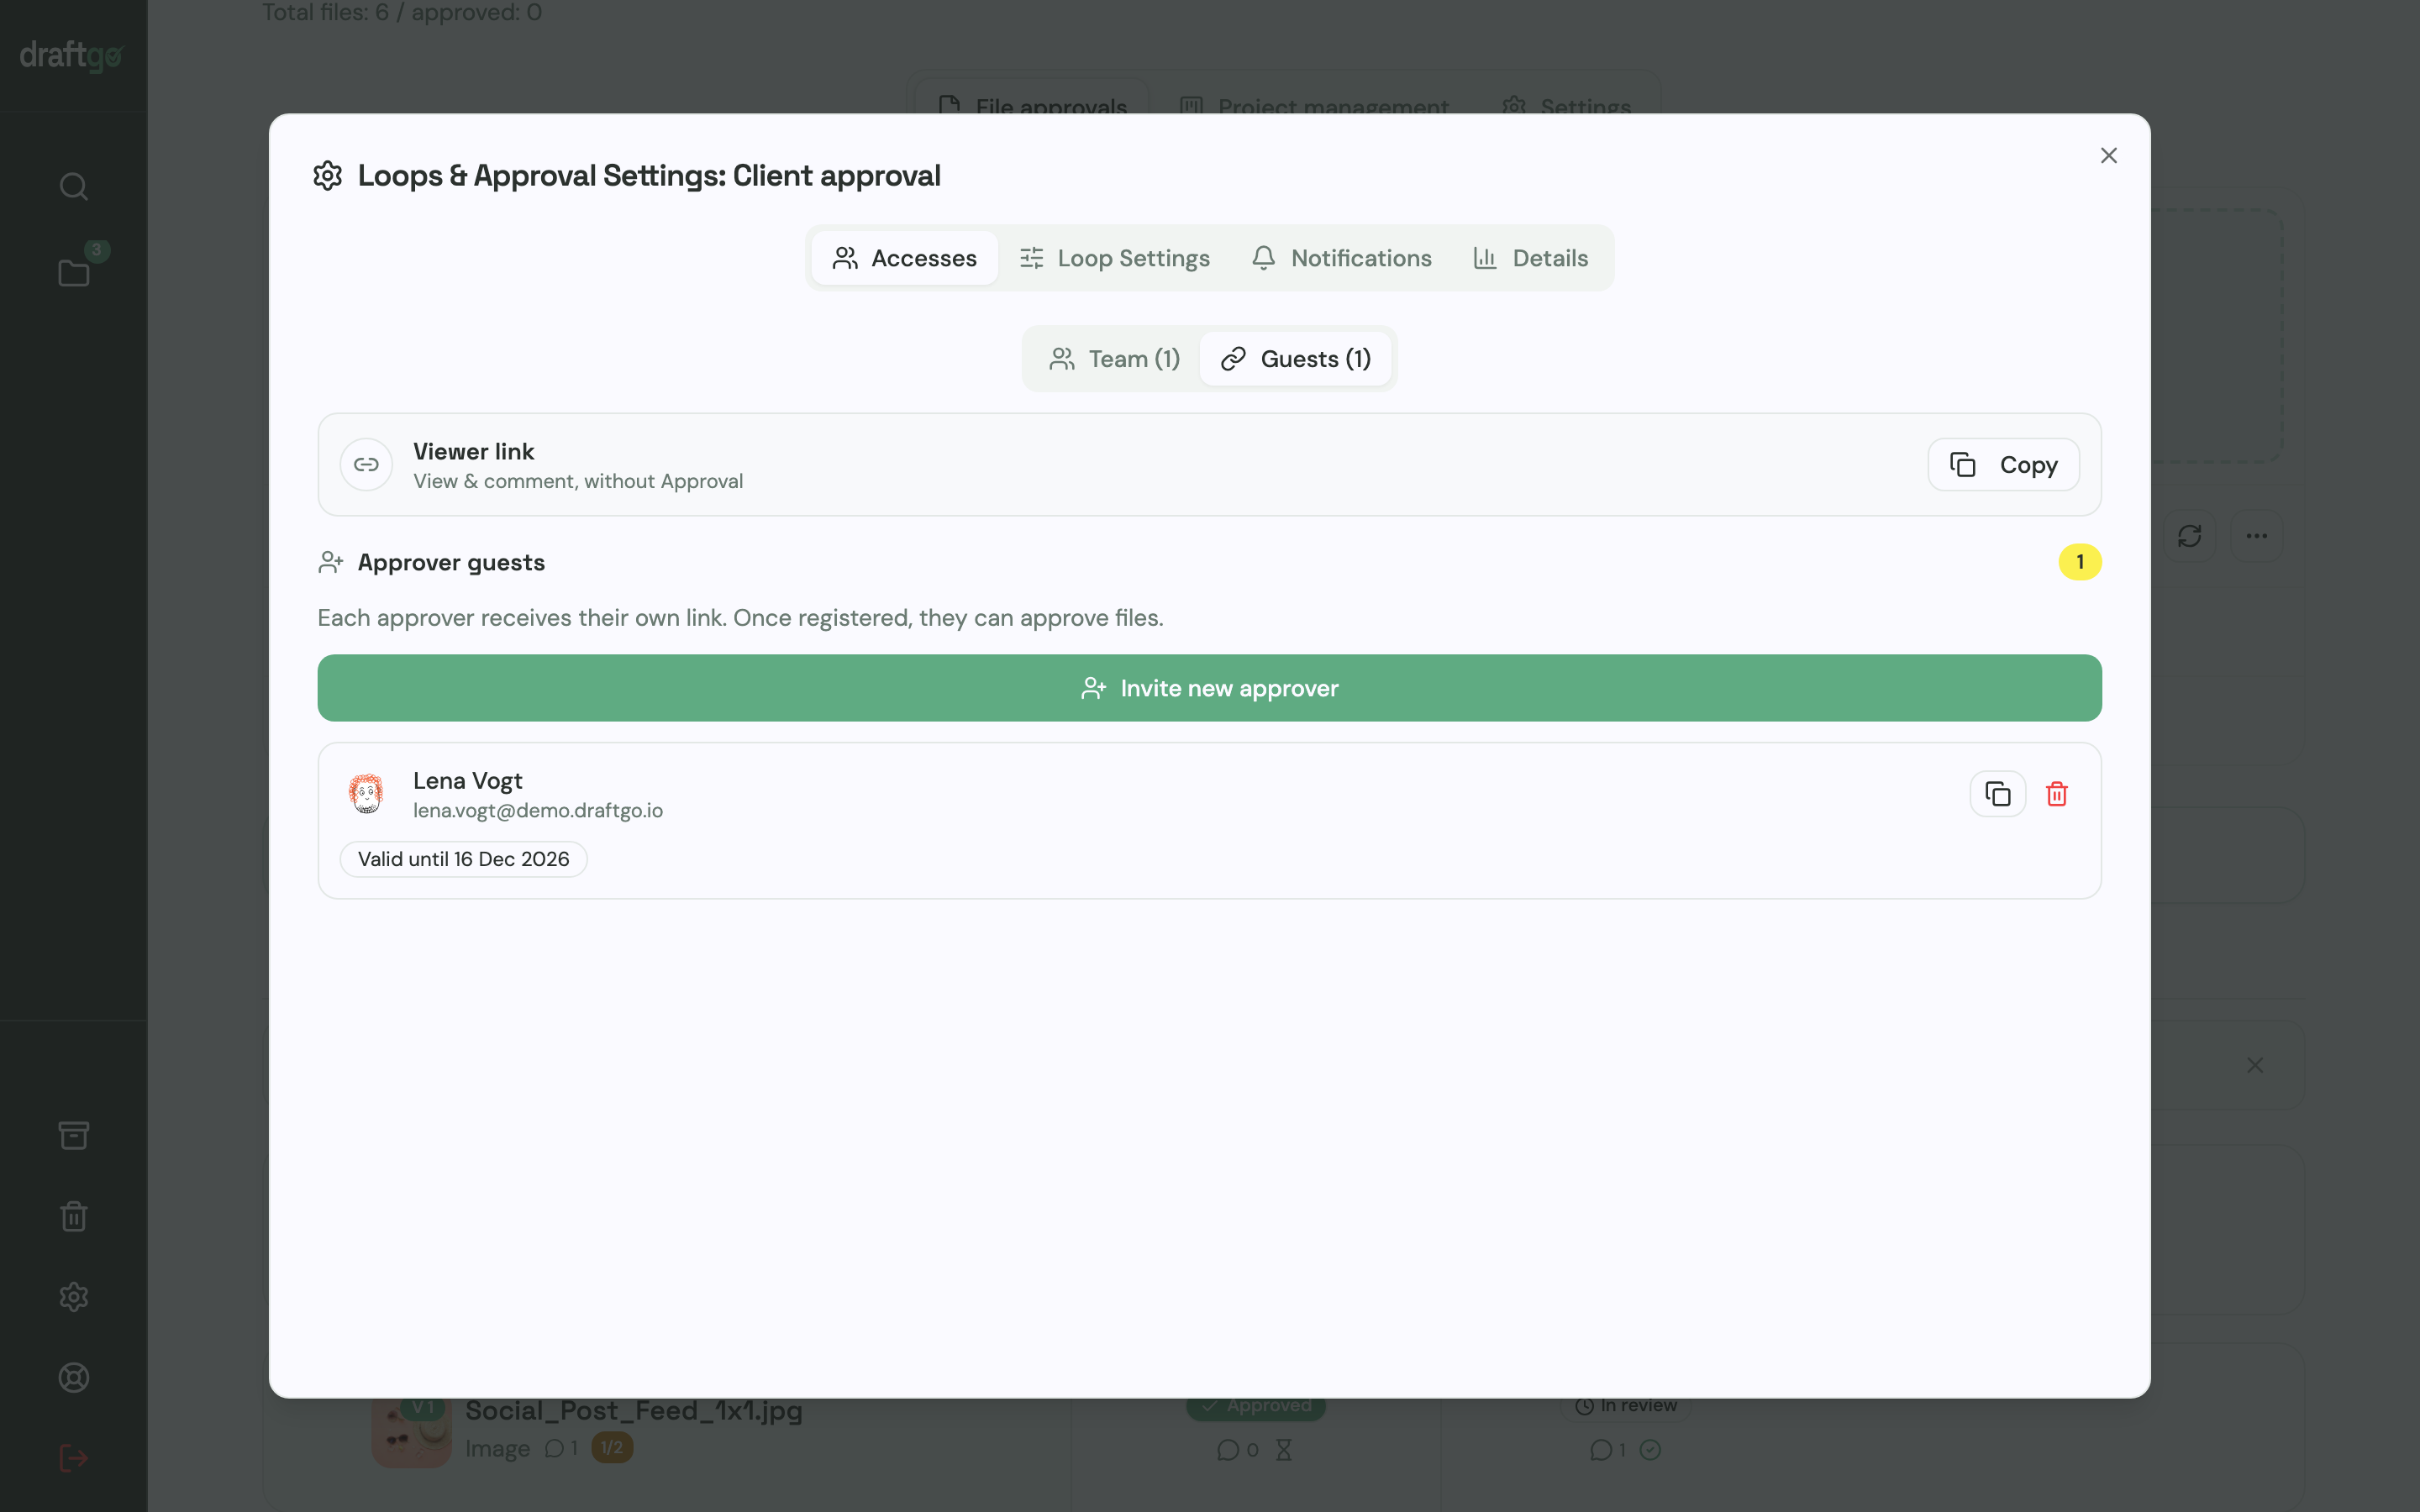
Each loop has a rule on whether all approvers, a set number or any one of them must approve, set separately for your team and for guests. The person who decides, such as the publisher or the client, gets a personal approver link. Authors and other readers who should only comment use the loop’s shared viewer link, which cannot approve. Neither link needs an account.
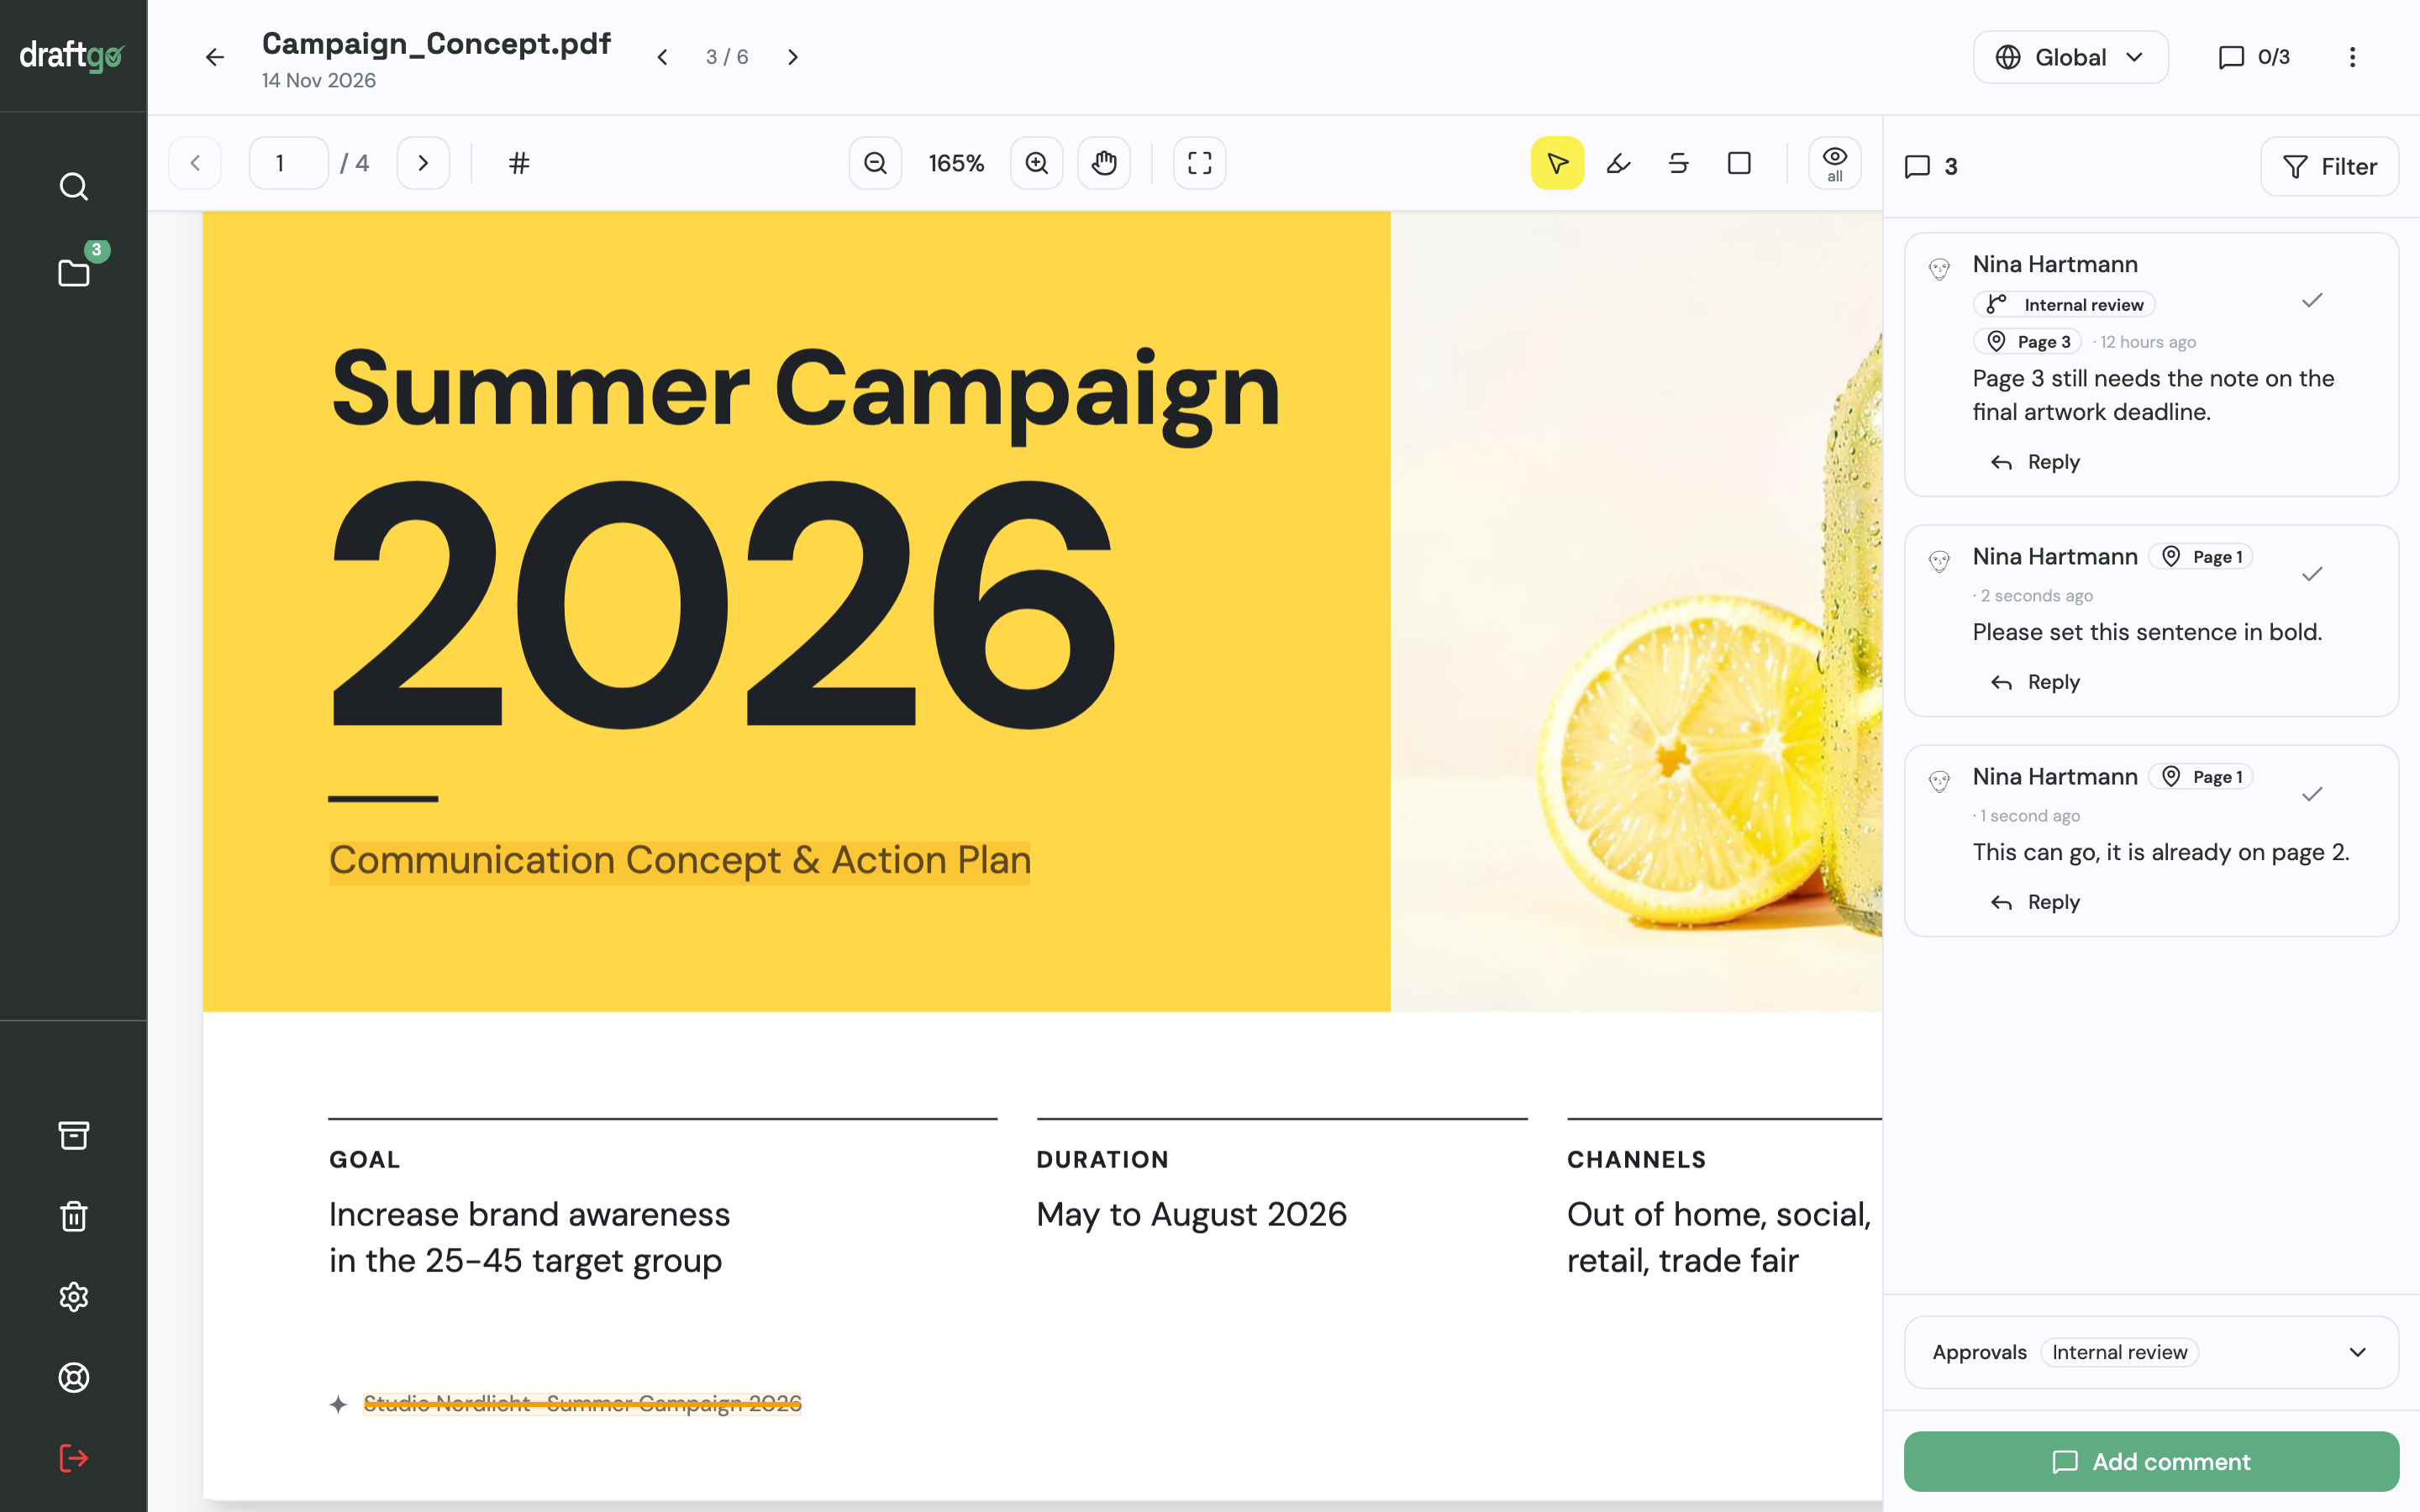
Readers highlight or strike through text on the page or comment at a spot, and each comment shows its page number. They reply in the thread, mention colleagues with @, and whoever applies a correction resolves the comment.
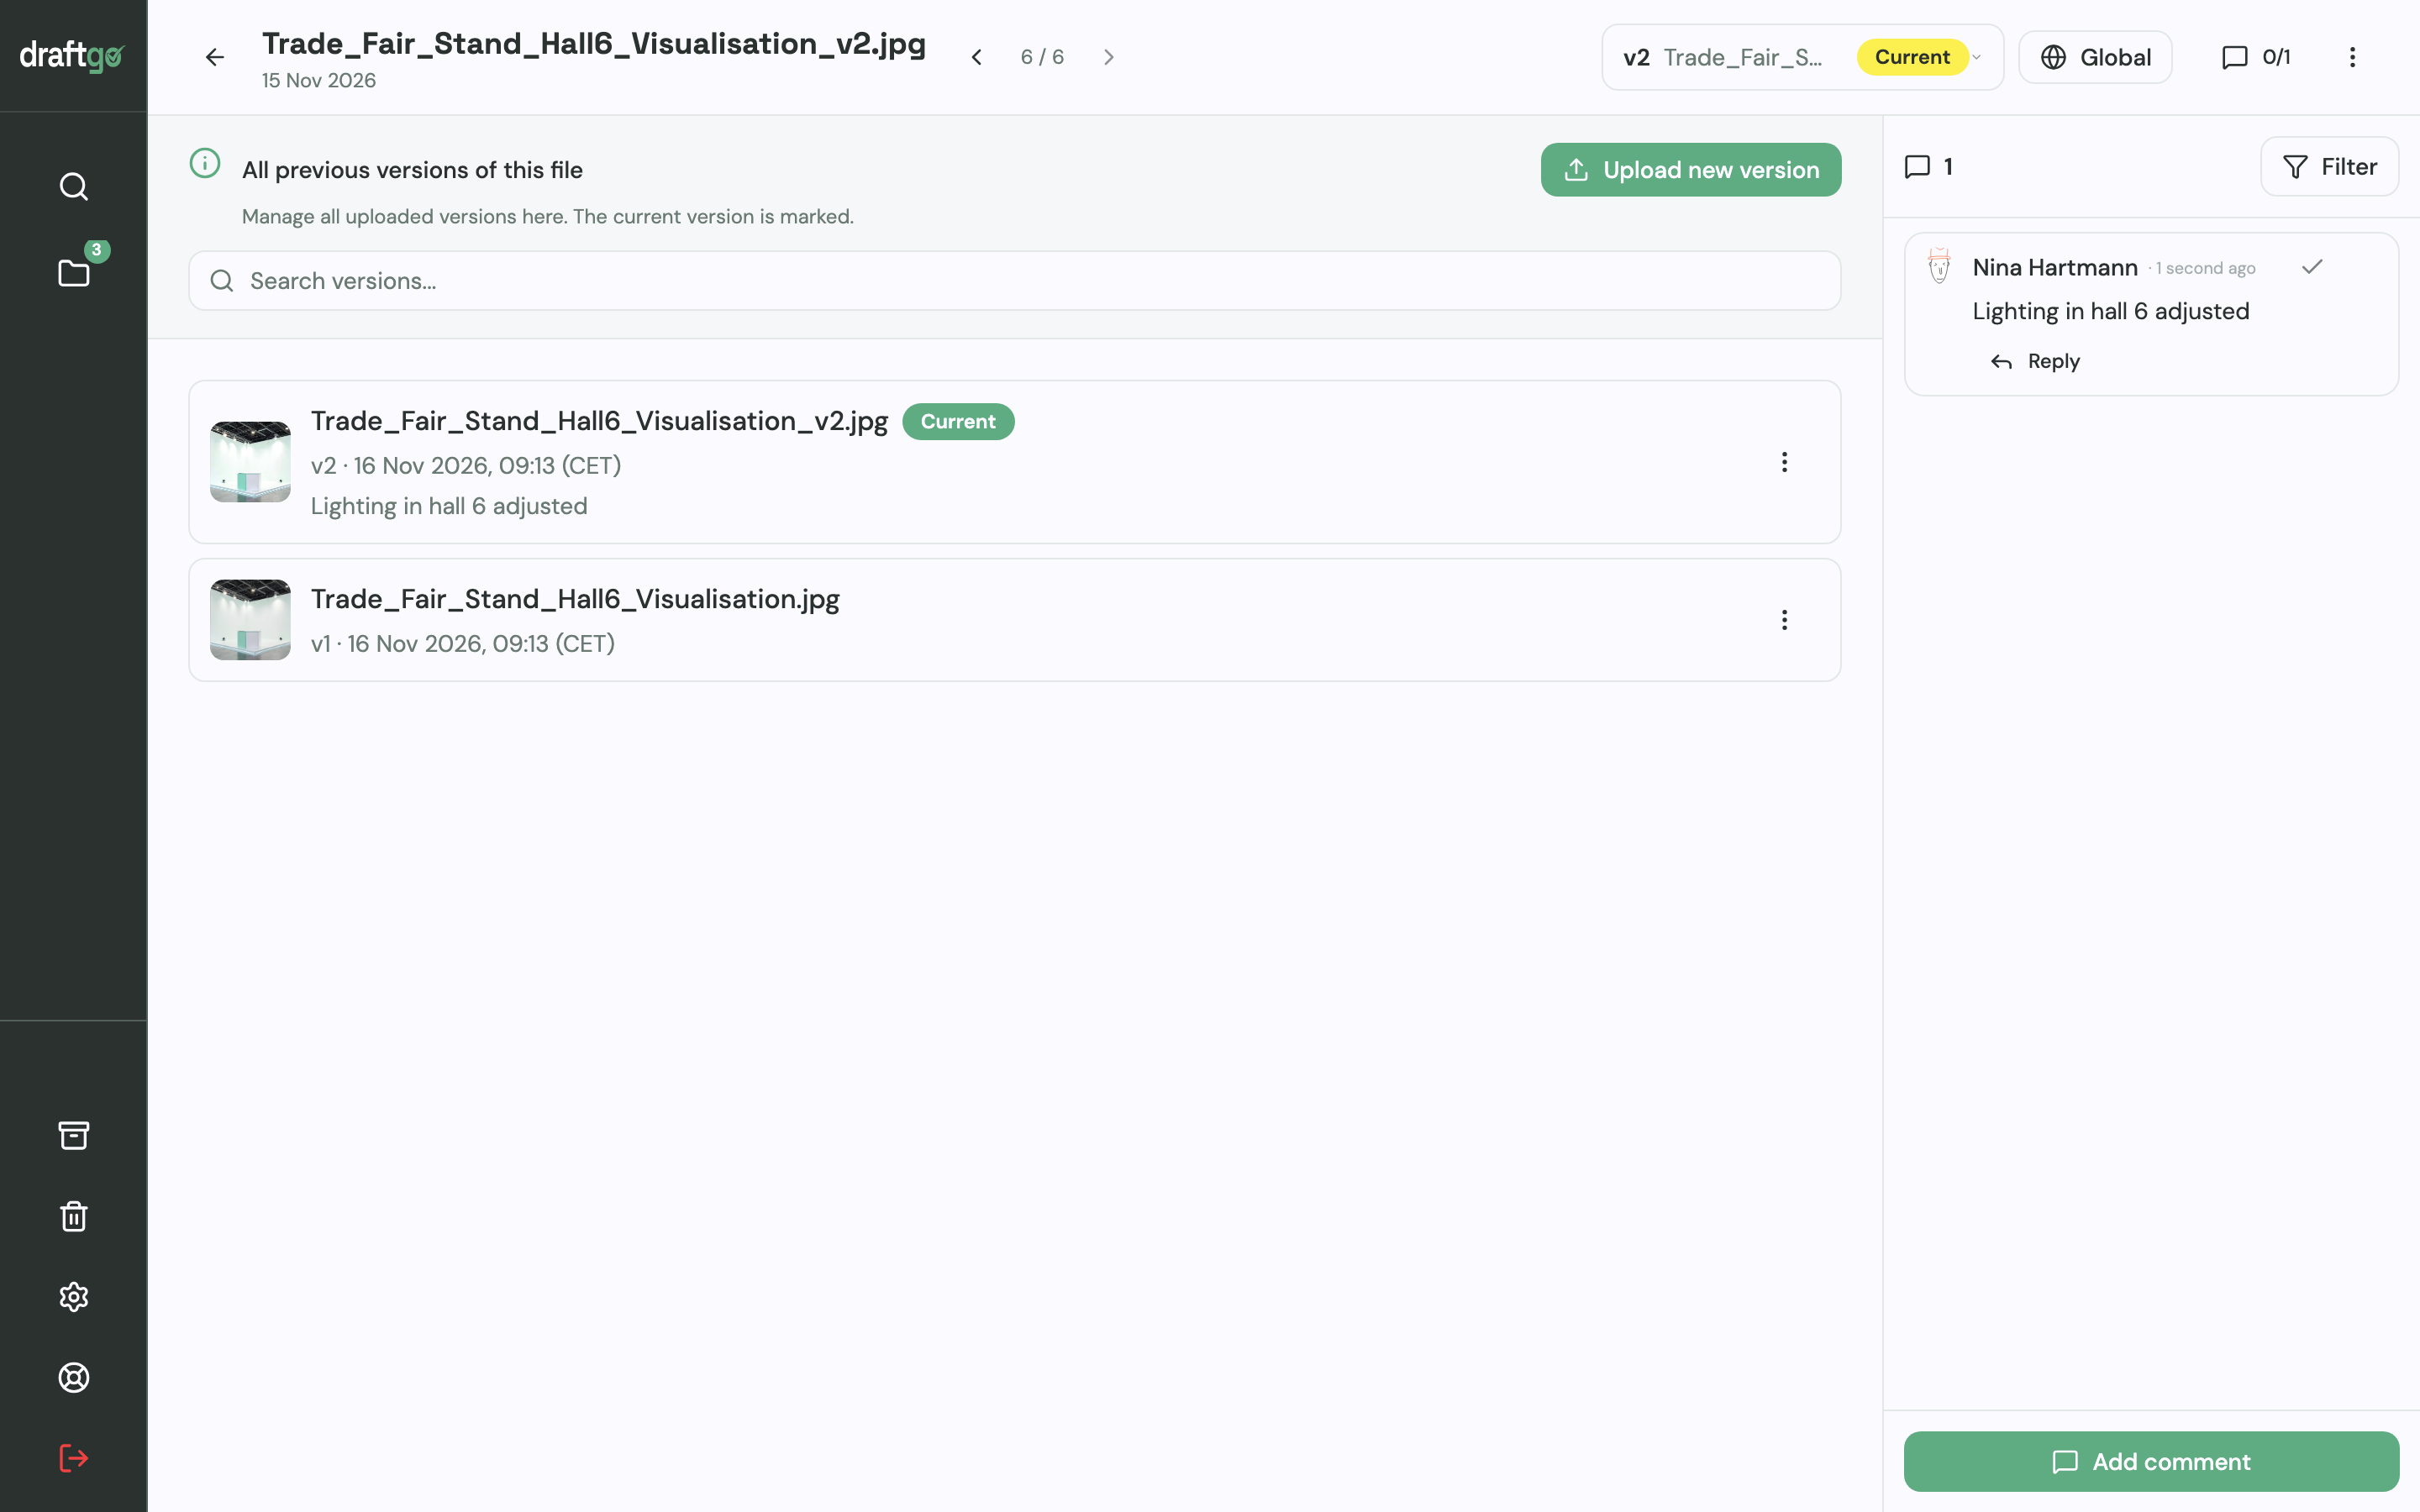
The corrected proof goes onto the same file as a new version, with a note such as “Second proof, corrections from round 1 applied”. Earlier versions stay available, and the new version starts the approvals again, so a sign-off always refers to the file the approver saw.
Before a proof goes out, you can start the AI review, with pages included from the Freelancer plan on. It looks for spelling mistakes, cut-off text or very small type, and its findings appear as comments from our AI agent “GO”. The activity log records approvals, comments, versions and downloads with person and time, and an optional daily or weekly summary lists waiting approvals. The technical check of the print data stays with your printer.
Stored data is kept on EU servers in the Frankfurt data centre.
How publishers and editorial teams work with draftgo is shown on the page for media and publishing.
FAQ
What is the difference between a publishing workflow and an editorial workflow?
The two terms overlap. In this guide, an editorial workflow means the editing stages, from acceptance to the copyedit. A publishing workflow adds layout, proofs, the final sign-off and publication, so it ends with the published piece.
How many proof rounds should you plan?
Plan two: a first proof that collects every correction and a second that checks them. If you need a third round, check whether content questions reached the proof stage. Agree the number of rounds with authors and clients before the first proof.
Who should give the final sign-off?
Choose one named person who answers for what gets published, for example the publisher or editor-in-chief in a publishing house, the head of content in an in-house team, or the client for commissioned work. Name that person and a stand-in before the first proof.
Can authors approve their own proofs?
Authors check their proofs and answer the queries on them. Whether their confirmation is also the final sign-off is up to you; if the editor or publisher answers for layout and production too, they sign off after the author.
Conclusion
Write down the seven stages for your next title or issue, with one person who signs off each, and move every content change before layout. Collect corrections on one shared proof per round, and sign off the exact file that goes to print or online.
Try it free – draftgo is free for 14 days, no credit card needed.
Written by
Emilia
Content Producer
Ready to streamline your approval processes?
Get started with draftgo today and see how easy professional collaboration can be.