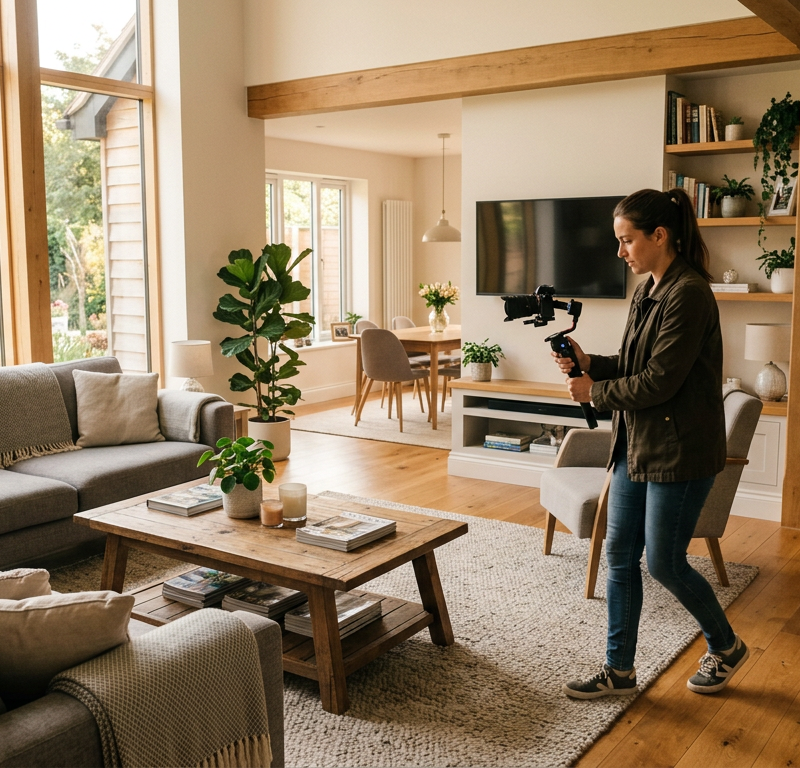
The seller watches the first cut of the listing video on the train home and replies by text: the garden comes too late, the kitchen looks dark, and is that the old sofa in the living room? The listing agent forwards the message to the videographer with “see below” and adds her own note about the end card in a separate email. An hour later, the brokerage’s office manager asks in a group chat whether the vertical version is ready for Friday. Nobody says at which second the kitchen looks dark.
The listing waits because the feedback arrives without timestamps, through three channels, and nobody has said who gives the final yes. Below are the video types that market a property and a workflow that ends with the seller’s approval.
What is real estate video marketing?
Real estate video marketing means using video to sell a property, show its area or introduce the agent who sells it. It covers the listing walkthrough as well as aerial shots of the plot, short clips for social media and the agent’s own channel.
In NAR’s 2025 Profile of Home Staging, buyers’ agents said photos (73%) and videos (48%) in their listings were highly important to their clients, and 47% of sellers’ agents rated videos as much more or more important to theirs.
A listing video also shows strangers the inside of someone’s home, so the seller should see every cut before it is published.
6 types of real estate video and who approves them
Six types of video serve a listing and the agent’s own brand. The table shows where each one runs and who signs it off:
| Video type | What it shows | Where it runs | Who approves |
|---|---|---|---|
| Listing walkthrough | The property room by room, in a set order | Listing page, portals that accept video, YouTube | Seller and listing agent |
| Aerial footage | Plot, roof, garden and the surroundings | Inside the walkthrough or as its own clip | Listing agent, and the seller for shots of the property |
| Neighbourhood tour | Streets, parks, shops and transport near the home | Agent website, YouTube, social media | Listing agent or brokerage marketing |
| Vertical clips | Highlights cut from the walkthrough in 9:16 | Instagram Reels, TikTok, YouTube Shorts | Listing agent, and the seller for anything that shows the home |
| Agent video | The agent introducing themselves or giving a market update | Agent website, social media, email | The agent and the brokerage |
| Client testimonial | A past buyer or seller talking about the sale | Agent website, social media | The person on camera, then the agent |
Vertical clips use the walkthrough footage but are separate files with their own captions and crop, so they need a review of their own. Our guide to the social media approval tool covers how approvals for posts and reels can run.
According to NAR’s 2025 Technology Survey, 52% of the Realtors it surveyed use drone photography and video.
Before you book aerial shots
Aerial shots need a pilot who flies under the rules of your market. In the US, the FAA says a drone under 55 pounds can be flown for work or business under its Part 107 rules, with an FAA Remote Pilot Certificate and a registered drone (FAA, 2025).
In the UK, the Civil Aviation Authority’s Open Category is the main reference for most leisure flying and low-risk commercial work (CAA). For a drone with a camera from 100 g to under 25 kg, the person flying it needs a Flyer ID and whoever is responsible for it needs an Operator ID (CAA). Ask the videographer at booking which rules they fly under.
This article is general information, not legal advice.
A real estate video workflow in 6 steps
Six steps take a listing video from booking to publishing, and up to four roles share the work:
| Role | Does | Approves |
|---|---|---|
| Listing agent | Plans the shot list, books the shoot, reviews the first cut | Text overlays, end card and brand |
| Videographer or photographer | Films, edits and uploads each cut as a new version | Nothing, delivers the cuts |
| Seller | Checks that the home looks as agreed and nothing private is visible | The walkthrough and every clip that shows the home |
| Brokerage marketing | Checks logo, captions and end card against the brand | Through the agent or as a second approver |
Try it yourself: In the demo you work in a real draftgo workspace with sample data.
1. Write the shot list and name the approver
Agent and seller agree on the rooms and features to show, their order and what stays out of frame: family photos, documents, the alarm panel, a car with its number plate on the drive. On the same page, write down who approves. If a couple sells, they decide which of them gives the final yes and which one comments. For a listing, add the shot list and the approver’s name to your creative brief template.
2. Prepare the property
The seller tidies up, opens the curtains and moves bins and cars out of sight, and the agent walks through the day before.
3. Shoot and upload the first cut
The videographer starts with the walkthrough and cuts the vertical clips only after it is approved, so changes are made once. Reviewers get a link to watch and comment on, not a download. For choosing the listing photos from the same shoot, see our guide to photo proofing software.
4. Collect feedback at the exact second
The agent reviews first, then the seller. Each comment sits at the second it refers to: “show the garden before the hallway” at 0:04, “the kitchen looks dark” at 0:38. Our guide to video feedback tools explains timecode review from rough cut to final cut.
5. Check overlays and privacy before the approval
Before anyone approves, compare every text overlay with the listing: number of bedrooms, floor area, price and the agent’s phone number on the end card. Then watch the cut once only for privacy, without sound. Ask the videographer whether the music licence covers every platform where the video will run.
6. Approve, export and publish
The seller approves the final cut, and only then does the walkthrough go online, exported from that approved version in the formats each channel needs. If you keep cuts as separate files, the naming rules in our guide to document version control replace names like “final_v2” and “final_final”.
Common mistakes in real estate video marketing
The mistakes below delay a listing video or put something on screen that should not be there:
| Mistake | Better practice |
|---|---|
| Feedback by text message: “the bit after the stairs” | A comment at the exact second of the cut |
| The seller sees the video once it is live | Seller approval as the last step before publishing |
| A family photo or a document is visible on screen | A privacy check in the shot list and in the review |
| The overlay says four bedrooms, the listing says three | Overlays checked against the listing before approval |
| Three files called “final” in the inbox | One file with numbered versions |
| Vertical clips posted unchecked because “it’s the same footage” | Every clip reviewed as its own file |
Example: a family house from first cut to approval
A small independent brokerage books the same freelance videographer for most of its listings. This week’s job is a family house with a large garden: a walkthrough with two aerial shots, plus two vertical clips for the brokerage’s social channels. The sellers are a couple: she approves, he wants to comment.
The videographer uploads the first cut on Tuesday evening into a project with two loops, “Agent review” and “Seller approval”. The listing agent opens her approver link and leaves two comments: the garden should come first, and the phone number on the end card is the office line instead of her mobile. On Wednesday morning, version 2 is in the project with the note “Garden moved to the opening, end card corrected”. The agent approves.
The videographer then activates the file in “Seller approval”. The seller watches it on her phone, pauses where the camera passes the study and comments that a letter on the desk is readable. Her husband uses the viewer link and asks for quieter music. Version 3 fixes both and restarts the approvals in both loops, so the agent approves again in “Agent review” and the seller approves it in “Seller approval”. On Thursday the two vertical clips go through the same loops. On Friday the listing goes live with its walkthrough.
How it works in draftgo
In draftgo, the review of a listing video runs in one project, and clients take part in the browser without an account:
- Upload the cuts: Add the walkthrough and the vertical clips to the project. Files can be up to 500 MB, and the browser compresses larger videos of up to 800 MB before the upload.
- Two loops: Create “Agent review” and “Seller approval”. Each loop has a rule for whether all approvers, a set number or any one of them must approve, separately for team and guests. A project holds one loop on Free, three on Freelancer and as many as you need on Agency and Team; the plans are on the pricing page.
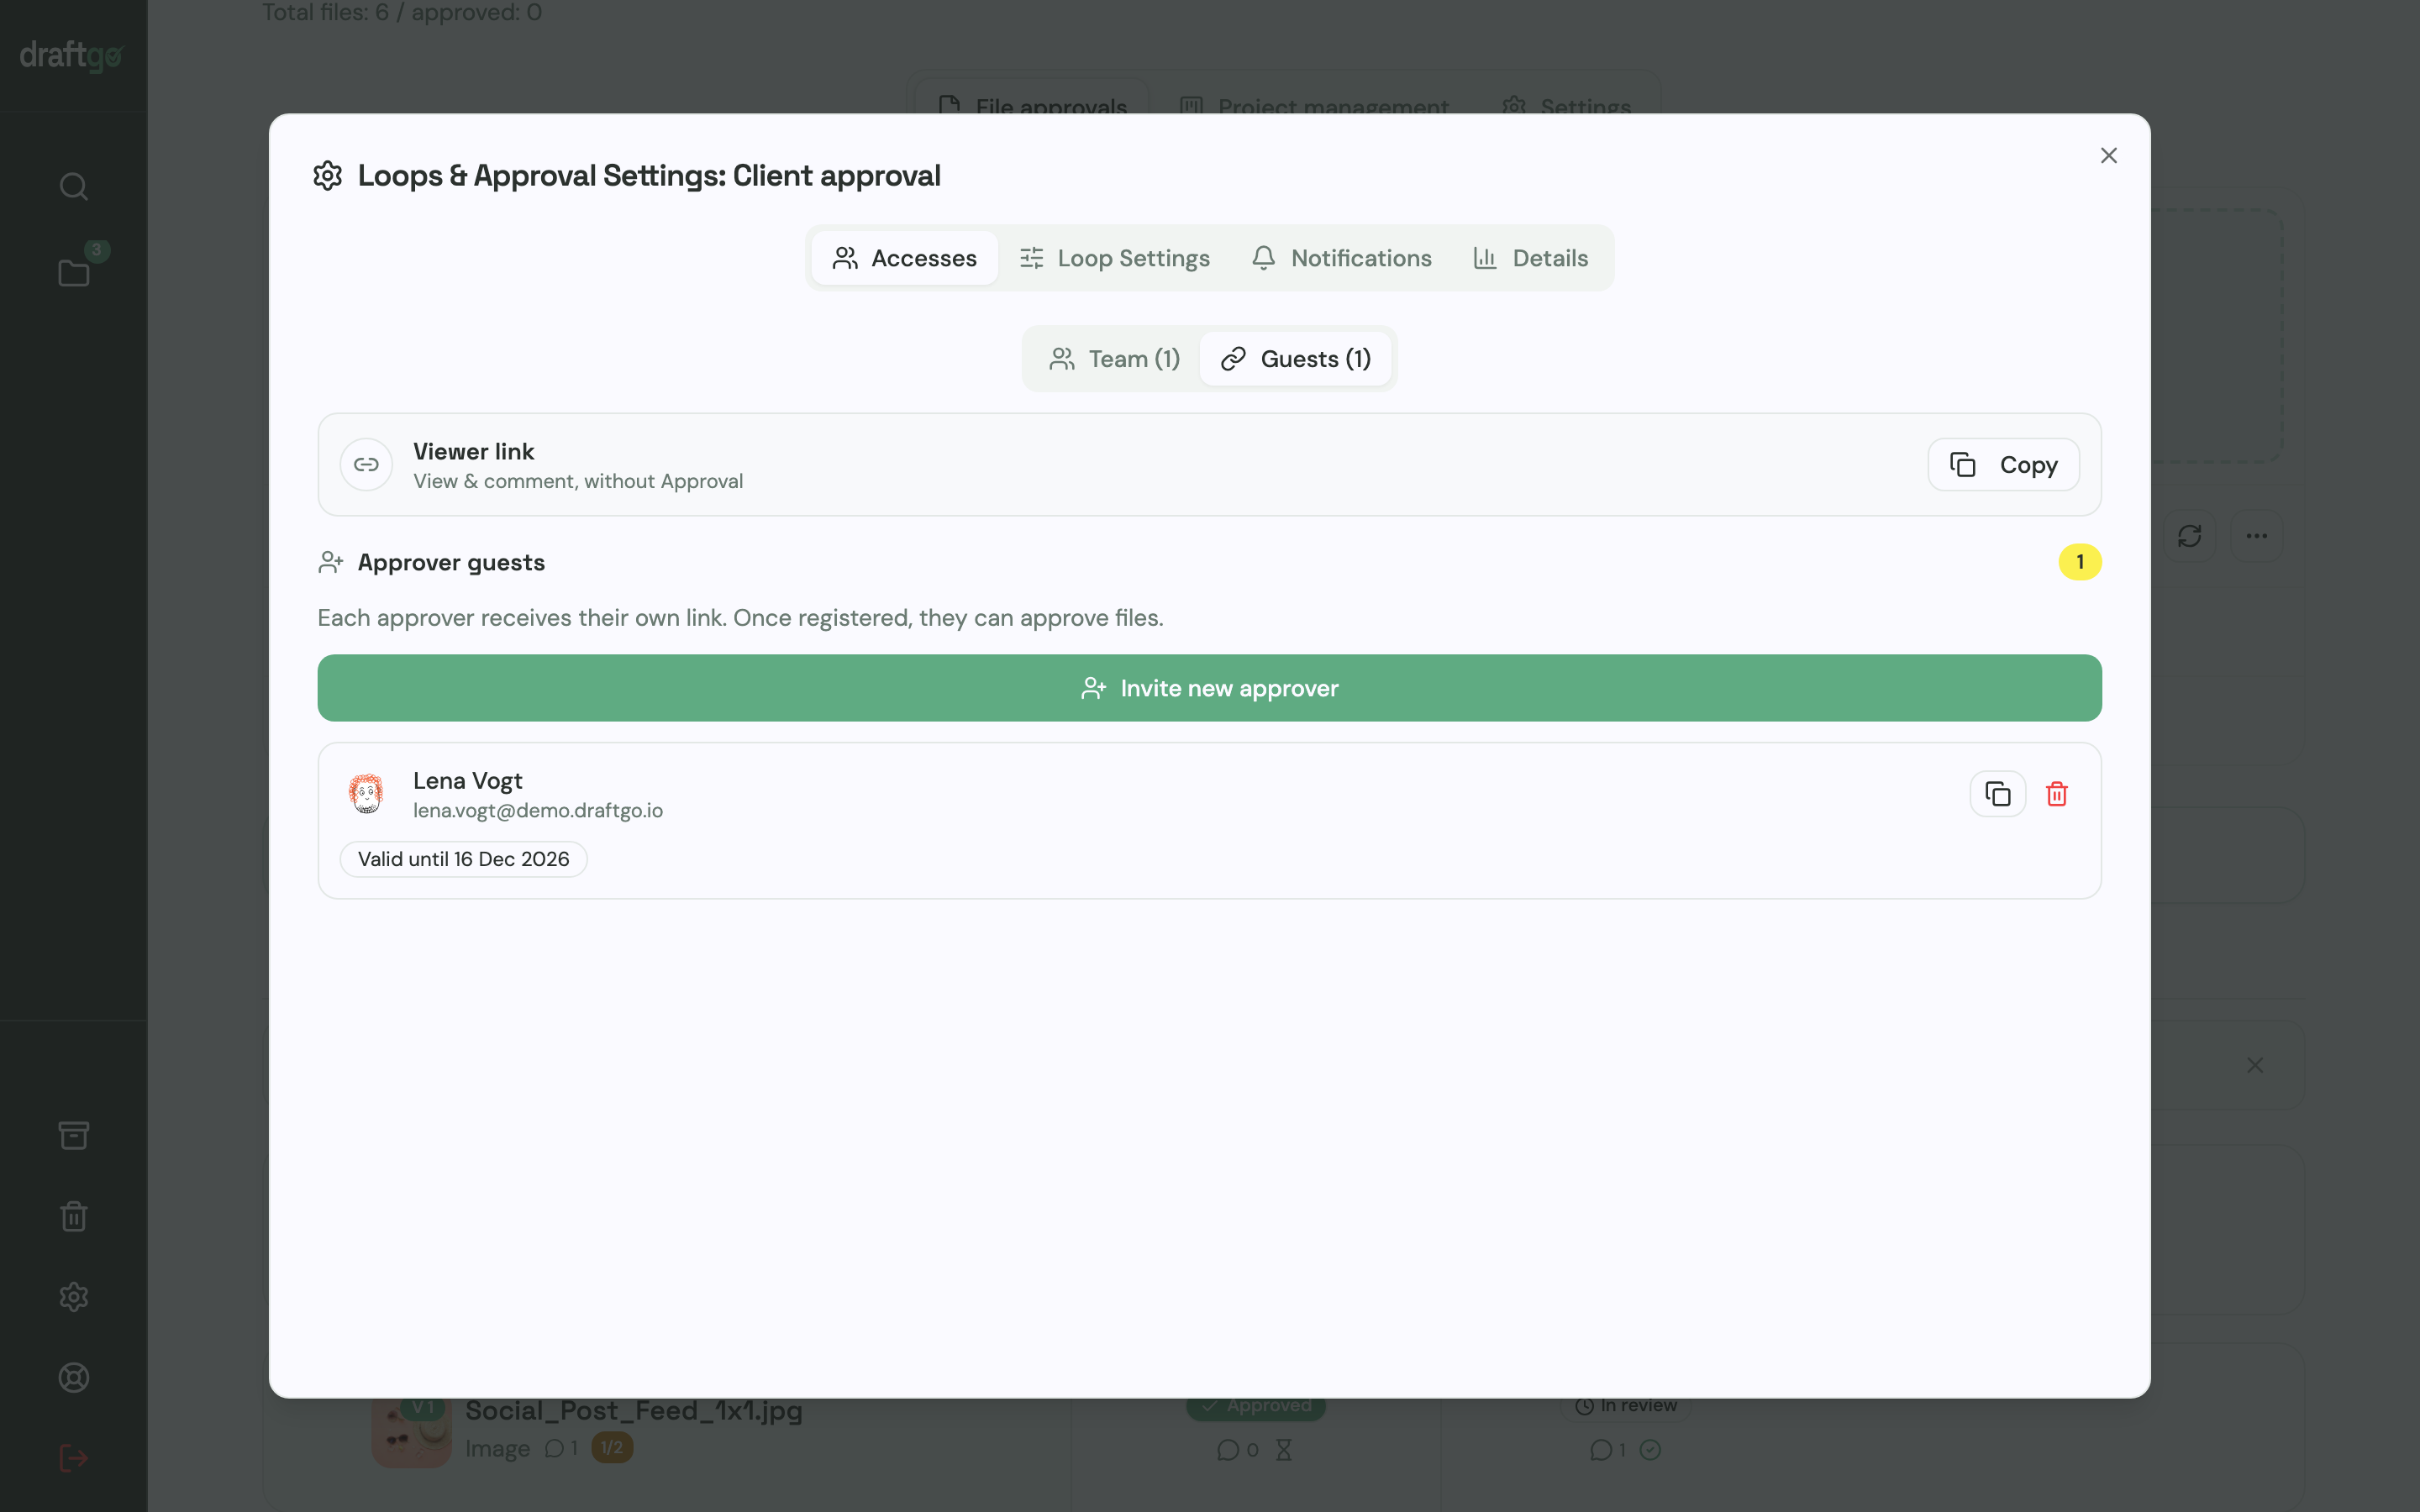
- Links for the seller’s side: The person who decides gets a personal approver link with their name and email address. Everyone else who should comment gets the shared viewer link, which cannot approve.
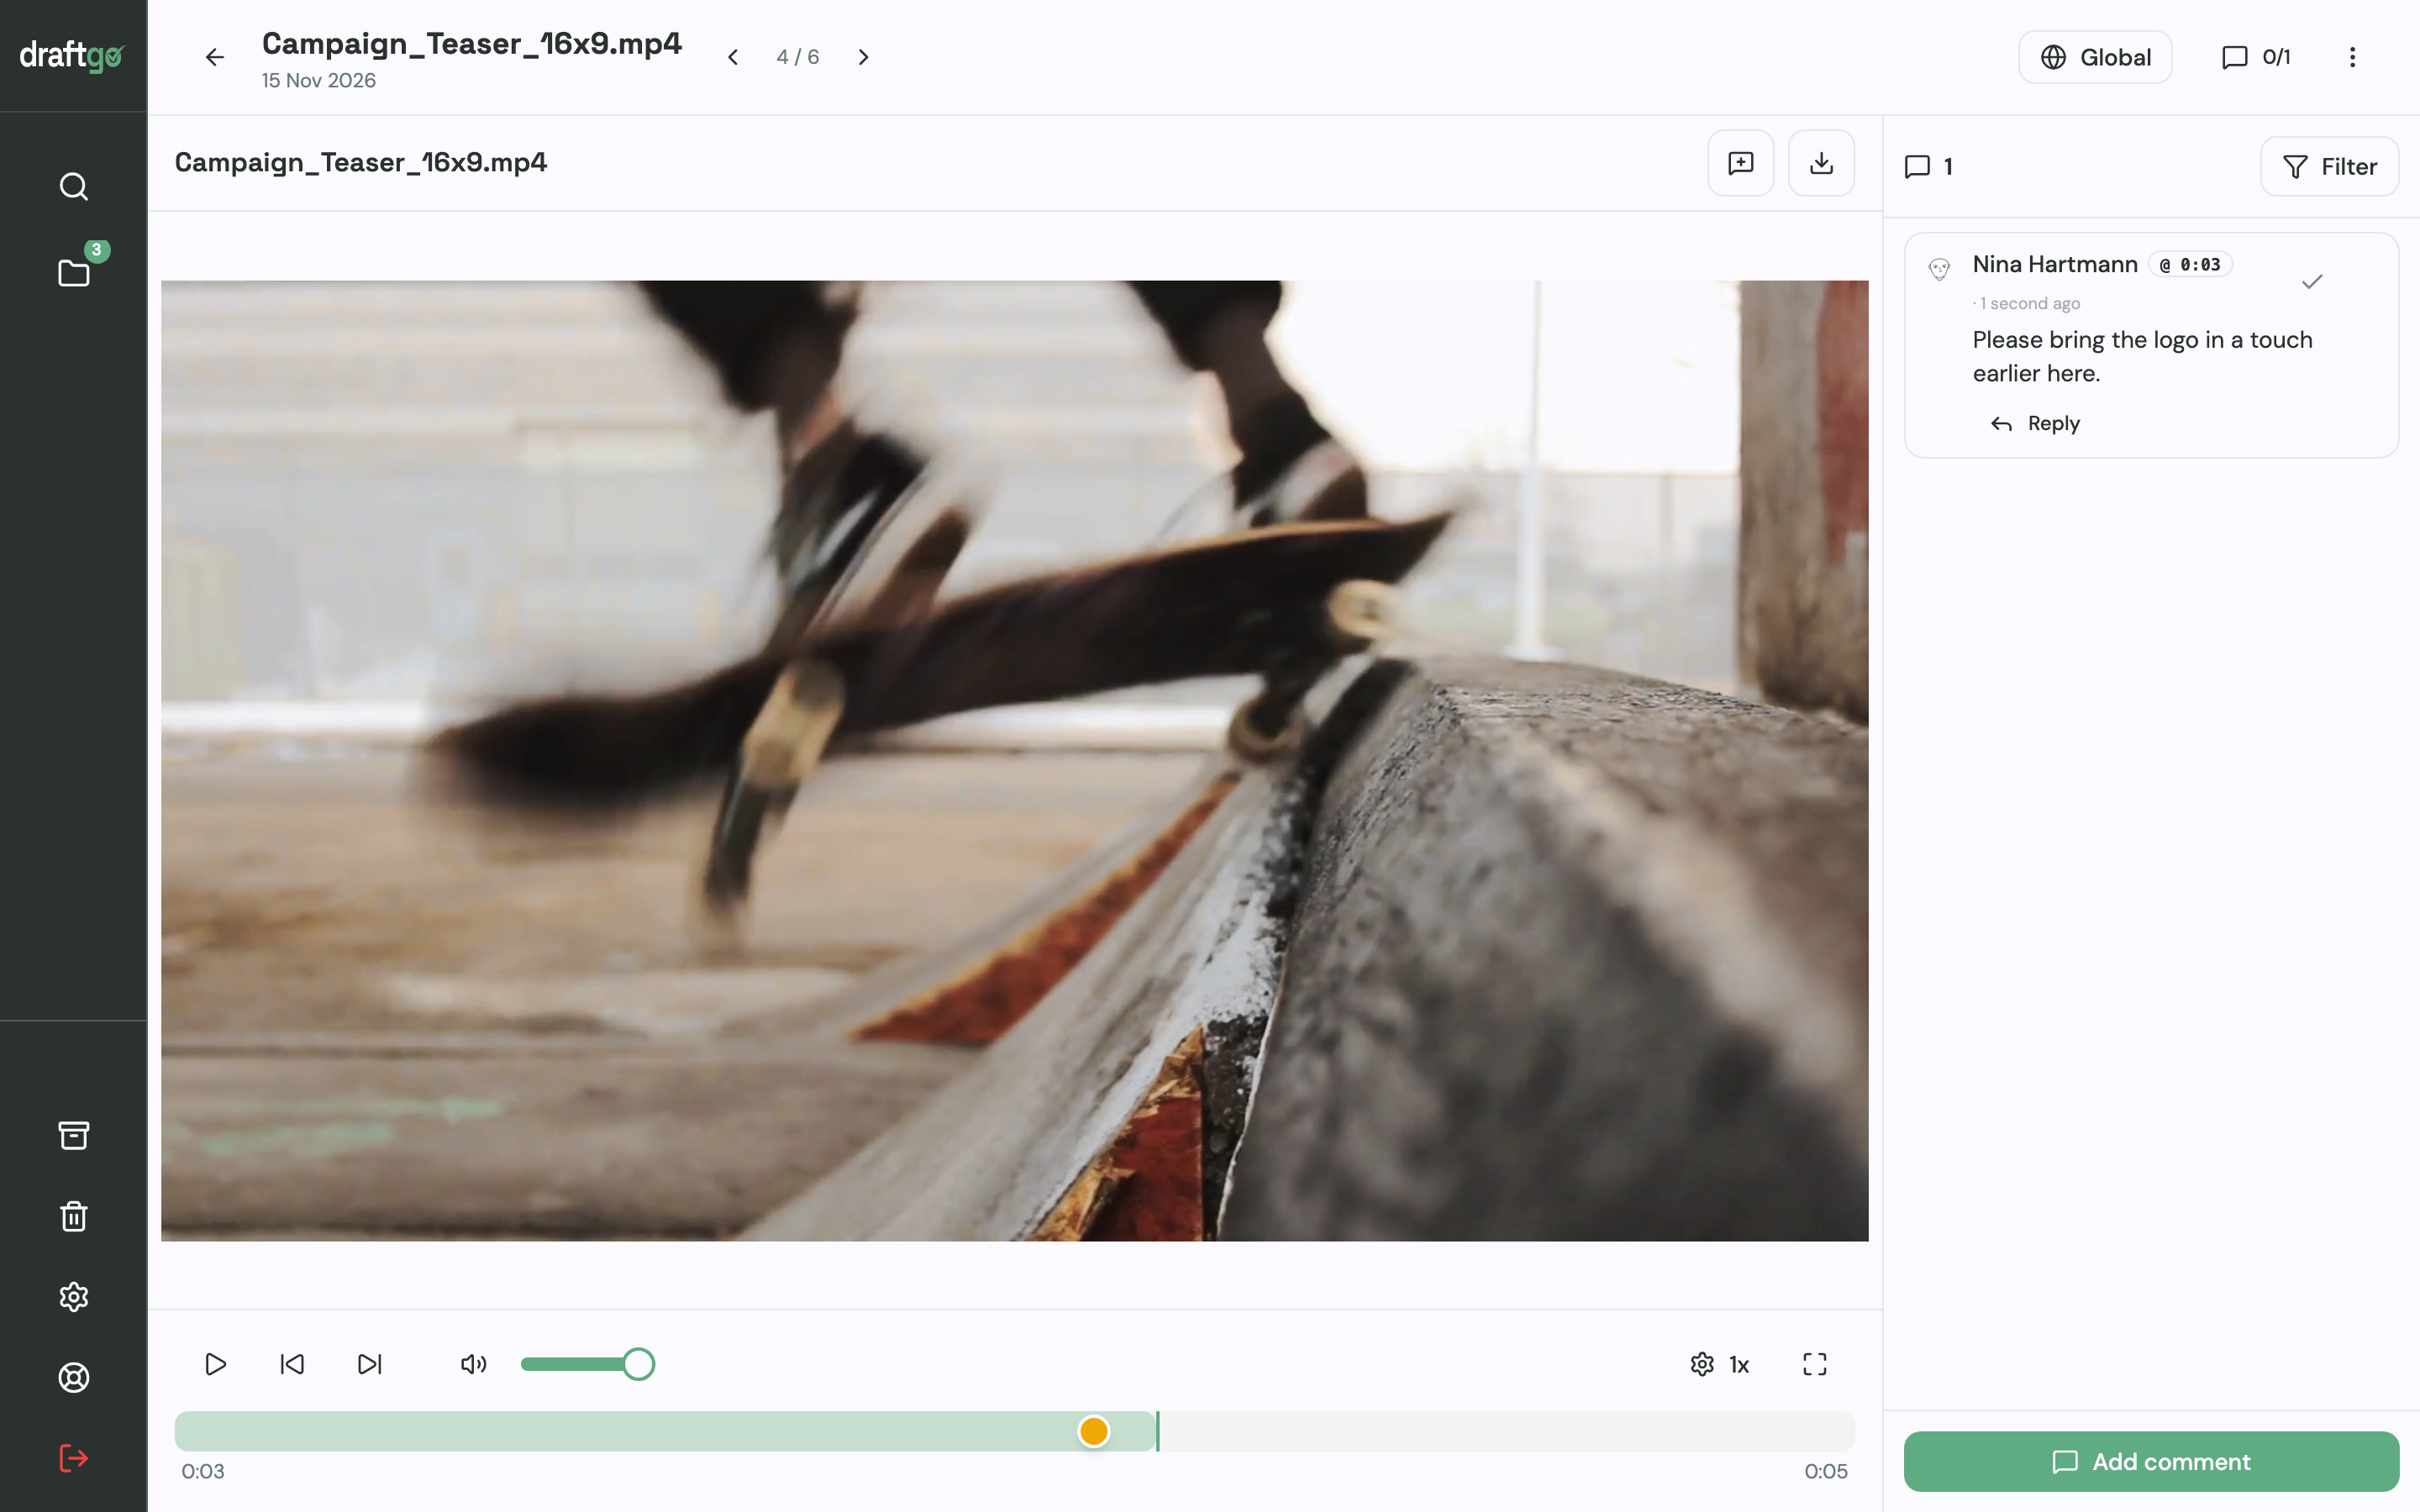
- Comments at the timecode: Reviewers pause the video and comment, on a laptop or a phone, and draftgo stores the second. A marker on the timeline shows where the change is meant.
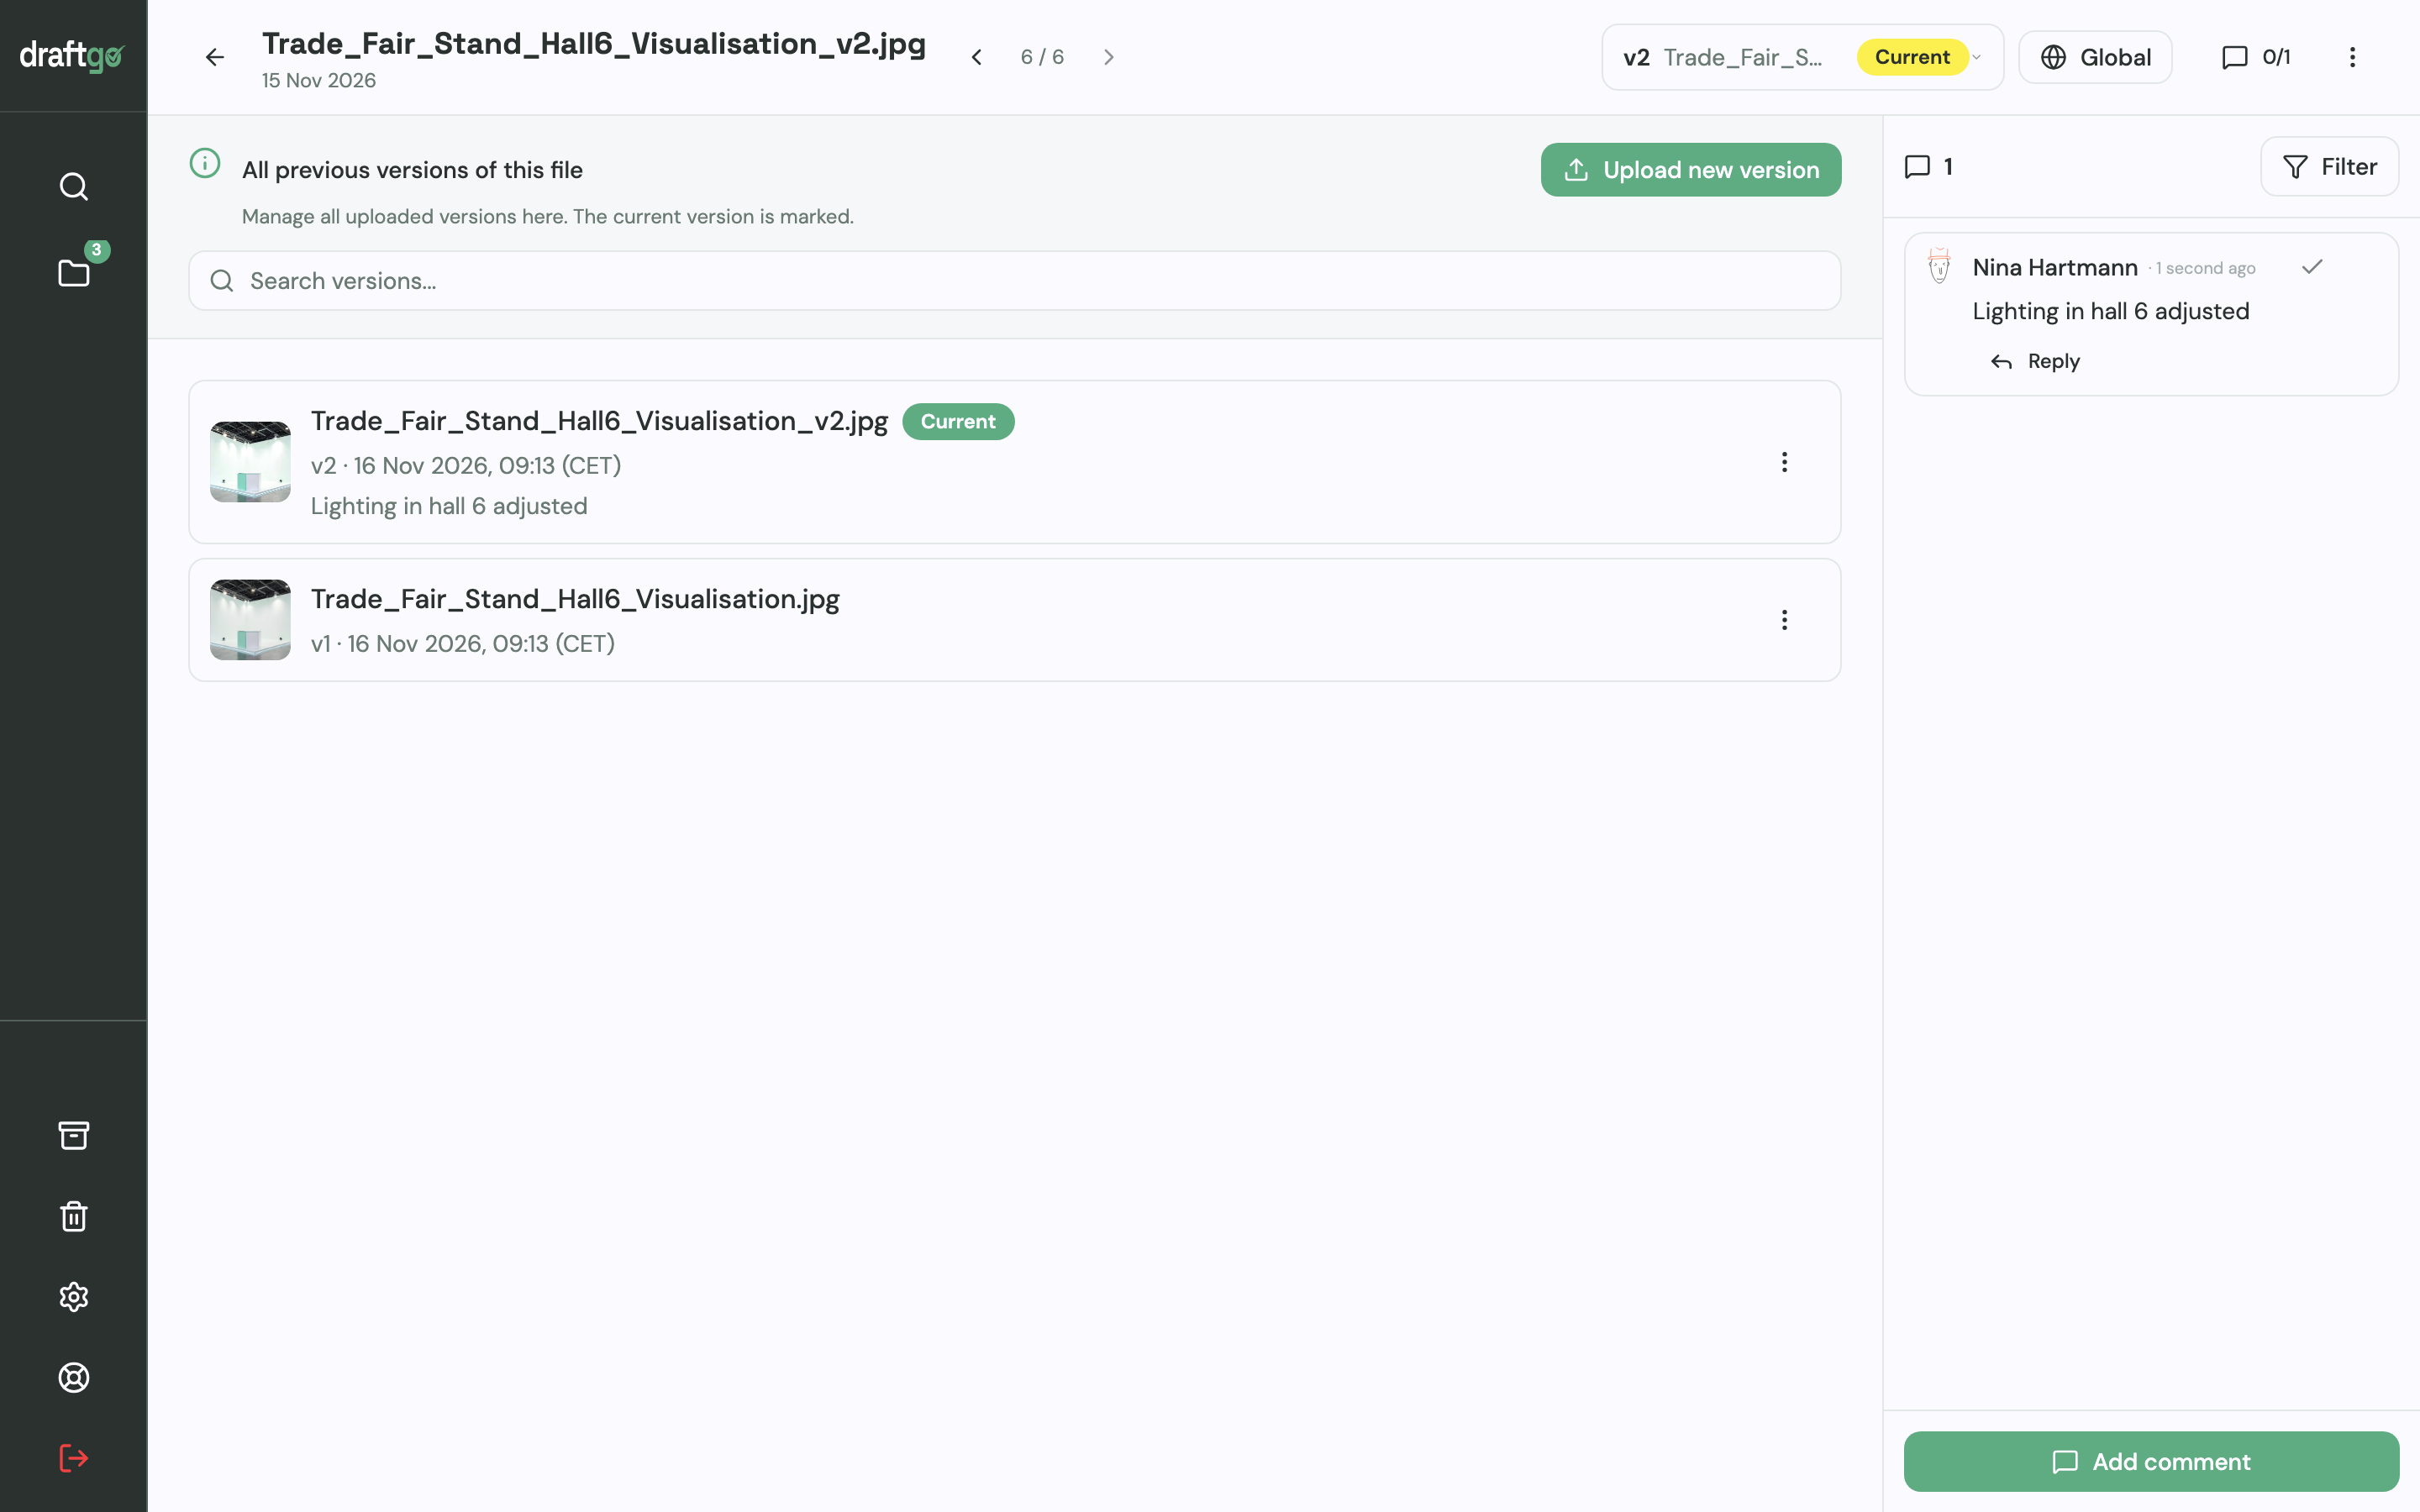
- New cut, new version: Upload the corrected cut as a new version of the same file and add a note on what changed. The approvals start again, and earlier versions stay available.
- Next loop and record: Once the agent has approved, you activate the file in “Seller approval”. The activity log records who approved which version and when, and you can export it as CSV, JSON or PDF.
The listing photos go into a gallery, where agent and seller comment on each image and give it one shared rating. The edit itself stays in your editing software, and draftgo is where each cut gets reviewed and approved. More on video review in draftgo for video production.
FAQ
Do sellers need an account to review a listing video?
No. In draftgo the seller opens a personal approver link in the browser, on a computer or a phone. There they comment at the exact second and approve the cut without signing up.
Who should approve a real estate video?
The seller approves how the home is shown, and the listing agent approves the marketing side: text overlays, end card and brand. When several people own the home, one of them gives the final approval and the others comment.
What is the difference between a video walkthrough and a 3D virtual tour?
A walkthrough is an edited film: the videographer chooses the route, the pace and the music. In a 3D tour, viewers move through a scanned model of the home and decide where to look. The seller should see both before they go live.
How long should a real estate video be?
There is no fixed length. A walkthrough shows each main room once, in the agreed order, while a vertical clip shows one feature, such as the garden or the kitchen. Before you cut, check the current length limit of the platform the clip is made for.
Conclusion
Start your next listing with a shot list that names the approver, collect feedback at the exact second and let the seller approve the final cut before anything goes online. Cut the vertical clips from the approved walkthrough, so every change is made only once.
Try it free – draftgo is free for 14 days, no credit card needed.
Written by
Emilia
Content Producer
Ready to streamline your approval processes?
Get started with draftgo today and see how easy professional collaboration can be.